Raised Garden Bed DIY: Build a Cedar Bed That Lasts for Years
Build a sturdy, long-lasting raised garden bed from scratch. This guide covers wood selection, sizing, step-by-step construction, soil mix, drainage, and placement — everything you need for a productive garden bed.
Why Build a Raised Bed
Raised garden beds are everywhere for a reason. They solve most of the problems that make in-ground gardening frustrating — poor soil, bad drainage, back pain, weeds, and critters. A raised bed lets you control the soil quality from day one, which means your plants start with ideal growing conditions instead of whatever clay or sand your yard happened to come with.
But there is a lot of bad advice out there about building them. People use the wrong wood and it rots in a season. They build them too wide to reach the center. They skip drainage and wonder why their plants are waterlogged. This guide walks through the entire process, starting with the single most important decision: what wood to use.
Choosing Your Wood
This is where most people either overspend or make a mistake they regret within a year. Here is an honest breakdown of your options.
Cedar (Recommended)
Cedar is the standard for raised beds, and for good reason. It is naturally rot-resistant, insect-resistant, does not need chemical treatment, and looks good. Western red cedar and eastern white cedar are the two most common species.
Expected lifespan: 8-15 years in ground contact, depending on climate and moisture.
Cost: $3-6 per linear foot for 2x6 boards (varies heavily by region — cedar is cheaper in the Pacific Northwest where it is milled, more expensive on the East Coast).
Bottom line: If budget allows, cedar is the best choice. It costs more upfront but you are building it once.
Pressure-Treated Pine
Modern pressure-treated lumber uses ACQ (alkaline copper quaternary) or CA-B (copper azole), which replaced the older CCA (chromated copper arsenate) treatment that was phased out for residential use in 2003. The current treatments are considered safe for vegetable gardens by the EPA and by university agricultural extension programs.
Expected lifespan: 15-20+ years.
Cost: $1-2 per linear foot for 2x6 boards. Significantly cheaper than cedar.
Bottom line: Safe, cheap, and lasts a long time. If the cost of cedar is prohibitive, pressure-treated pine is a perfectly reasonable choice. Some gardeners still prefer not to use it in vegetable beds as a precaution, and that is a personal decision.
Untreated Pine, Spruce, or Fir (SPF)
The cheapest option at the lumber yard, and the one you will regret. Untreated softwood in ground contact rots quickly — often within 1-2 growing seasons. You will get mushrooms growing out of your garden bed walls and boards crumbling apart.
Expected lifespan: 1-3 years.
Cost: Under $1 per linear foot.
Bottom line: Only use this if you are building a temporary bed that you plan to rebuild in a year or two. Otherwise, spend the money on cedar or treated lumber.
Composite Lumber
Products like Trex or similar composite decking boards can be used for raised beds. They will never rot, never need maintenance, and last essentially forever. But they are expensive and heavier to work with.
Expected lifespan: 25+ years.
Cost: $3-8 per linear foot, depending on brand and profile.
Bottom line: Great if you have leftovers from a deck project. Hard to justify buying new for a garden bed unless you want it to be a permanent landscape feature.
Other Options
- Redwood: Excellent rot resistance, similar to cedar, but extremely expensive outside of California.
- Concrete blocks or cinder blocks: Not a woodworking project, but they work and last forever. Functional, not beautiful.
- Galvanized steel or corrugated metal: Trendy, durable, and attractive. Usually more expensive than wood but lasts decades. Watch for sharp edges.
- Railroad ties and old pallets: Avoid both. Railroad ties are soaked in creosote (a carcinogen). Pallets may be treated with methyl bromide (look for HT-stamped pallets, which are heat-treated and safe, but even then the wood is low quality and rots quickly).
Sizing Your Bed
Getting the dimensions right matters more than most people realize.
Width: 3-4 Feet Maximum
You need to be able to reach the center of the bed from either side without stepping into it. For most adults, that means 4 feet is the maximum width. If the bed will be against a wall or fence where you can only access it from one side, limit the width to 2 feet.
Why does this matter? Stepping into a raised bed compresses the soil, destroying the drainage and aeration that makes raised beds work. The entire point is that the soil stays loose and uncompacted.
Length: Whatever You Want (Within Reason)
Common lengths are 4, 6, 8, 10, and 12 feet. Longer beds are fine structurally as long as you brace them properly. Beds longer than 8 feet benefit from a cross brace in the middle to prevent the long sides from bowing outward under soil pressure.
Standard lumber comes in 8-foot lengths, so designing around multiples of 4 or 8 feet minimizes cuts and waste.
Height: 10-24 Inches
- 10-12 inches (two 2x6 boards stacked): The most common height. Sufficient for most vegetables, herbs, and flowers. Good depth for root development.
- 18-24 inches (three or four boards): Better for root vegetables like carrots and potatoes. Easier on your back and knees. Uses more soil, which costs more to fill.
- 30-36 inches: Tabletop height for accessibility (wheelchair users, people with mobility limitations). Requires significant soil volume and strong walls to handle the lateral pressure.
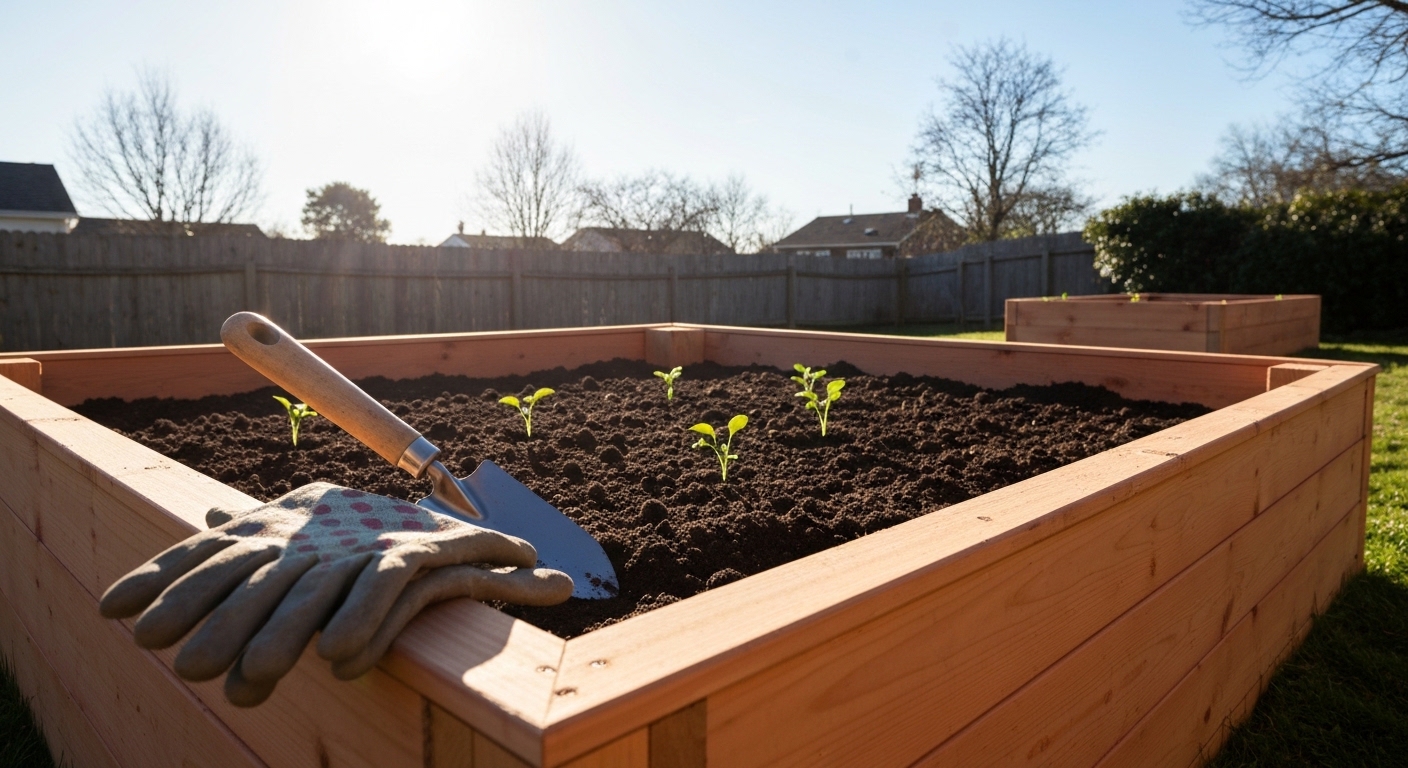
For this guide, we will build a standard 4x8-foot bed, 12 inches tall (two 2x6 boards). This is the most popular size for a reason — it is practical, economical, and big enough to grow a meaningful amount of food.
Tools You Will Need
- Tape measure
- Circular saw or miter saw (or have the lumber yard cut the boards)
- Drill or impact driver
- 3-inch exterior-grade deck screws or structural screws
- A framing square or speed square
- Level
- Clamps (helpful but not essential)
Optional but useful:
- Countersink drill bit (for cleaner-looking screw heads)
- Landscape fabric and staple gun
- A wheelbarrow (for moving soil)
Materials List (4x8-Foot Bed, 12 Inches Tall)
| Material | Quantity | Purpose |
|---|---|---|
| 2x6x8 cedar boards | 6 | Walls (2 for each long side, 1 for each short side cut in half) |
| 4x4x12-inch cedar posts | 4 | Interior corner supports |
| 3-inch exterior deck screws | ~40 | Assembly |
| Landscape fabric (optional) | 1 piece, 5x9 feet | Weed barrier on the bottom |
Note on the corner posts: You can use 2x2 stakes, 4x4 posts cut to 12 inches, or even metal corner brackets. The purpose is to give the screws something to bite into at the corners and keep the box rigid. I prefer 4x4 posts because they are sturdy and give you a generous target for driving screws.
Step-by-Step Build
Step 1: Cut Your Lumber
You need:
- Four 8-foot 2x6 boards (long sides — no cuts needed)
- Four 4-foot 2x6 boards (short sides — cut two 8-foot boards in half)
- Four 4x4 posts, each cut to 11.5 inches tall (the actual height of two stacked 2x6 boards)
If you do not have a saw or are not comfortable cutting, most home centers and lumber yards will cut boards to length for you — often for free.
Step 2: Lay Out the First Course
Find a level spot (we will talk about placement later) and lay out the first course of boards. Place two 8-foot boards parallel, 4 feet apart (measuring outside edge to outside edge, accounting for the thickness of the short boards). Set the two 4-foot boards as the ends, forming a rectangle.
Check for square. Measure the diagonals — from one corner to the opposite corner, both ways. If the two diagonal measurements are equal, your rectangle is square. If they are off, adjust the corners until they match.
Step 3: Install Corner Posts
Stand a 4x4 corner post upright inside each corner of the rectangle. The post should be flush with the top of the first 2x6 board (it will extend up to receive the second course).
Clamp or hold the post in place and drive two 3-inch screws through the long-side board into the post. Then drive two screws through the short-side board into the same post. Repeat for all four corners.
Step 4: Add the Second Course
Stack the remaining four boards on top of the first course — two 8-footers on the long sides, two 4-footers on the ends. Align them with the boards below.
Drive two screws through each board into the corner post. Also drive screws down through the top board into the bottom board every 2 feet along the length to lock the courses together and prevent them from separating as the wood dries and moves.
Step 5: Add a Center Brace (Recommended for 8-Foot Beds)
At the 4-foot mark on each long side, the soil pressure will try to push the boards outward over time. A center brace prevents this.
Cut a 4x4 post to 11.5 inches. Place it inside the bed at the midpoint of one long side. Screw through the boards into the post from the outside. You can also add a cross support — a piece of 2x4 running across the inside of the bed at the midpoint, screwed into the center braces on each side. This ties the two long walls together.
Step 6: Level the Bed (If Needed)
If your ground is not perfectly level, you have a few options:
- Dig down the high side and set the bed into the ground slightly.
- Build up the low side with gravel or soil.
- Use the landscape as-is and accept that one end will be slightly higher. Water will flow to the low end, which can actually be useful — plant water-loving crops at the low end and drought-tolerant herbs at the high end.
For a noticeable slope, terracing with multiple shorter beds stepping up the slope is more effective than one long bed.
Step 7: Install Weed Barrier (Optional)
If you are placing the bed on grass or an area with aggressive weeds, lay landscape fabric or a few layers of cardboard on the ground inside the bed before filling with soil. This suppresses weeds from growing up into the bed.
Do not use plastic sheeting — it blocks drainage and creates a swamp. Landscape fabric and cardboard both allow water to pass through while blocking weed growth. Cardboard breaks down over a season and adds organic matter to the underlying soil, which is a bonus.
Step 8: Fill with Soil
Do not fill a raised bed with garden soil from a bag or dirt from your yard. Raised beds need a mix that is lighter, more nutritious, and better draining than native soil.
The classic raised bed soil recipe:
- 1/3 topsoil — provides mineral content and weight
- 1/3 compost — provides nutrients and beneficial microorganisms
- 1/3 coarse vermiculite, perlite, or aged bark fines — provides drainage and prevents compaction
For a 4x8-foot bed that is 12 inches deep, you need roughly 32 cubic feet of soil mix (about 1.2 cubic yards). Buying bagged soil for a bed this size gets expensive quickly — 16 bags of 2-cubic-foot soil at $6-10 each. For beds this size or larger, ordering a bulk delivery of raised bed mix from a landscape supply company is usually cheaper. A cubic yard of raised bed mix typically runs $30-60 delivered.
Placement Tips
Where you put the bed matters as much as how you build it.
- Sun exposure: Most vegetables need 6-8 hours of direct sun per day. Orient the long side of the bed east-west for maximum sun exposure. Watch your yard at different times of day to identify shadow patterns from trees, buildings, and fences.
- Water access: Place the bed within hose reach. Dragging a hose across the yard every day gets old fast.
- Distance from trees: Tree roots will find their way into rich raised bed soil. Keep beds at least 10 feet from large trees. If you cannot avoid tree roots, line the bottom of the bed with hardware cloth — it will not stop roots entirely but it slows them down.
- Flat ground: A level bed holds water evenly. A bed on a slope means one end is always dry and the other is always wet.
- Proximity to the kitchen: This is more important than you think. A bed 20 feet from the back door gets harvested and maintained regularly. A bed at the far end of the yard gets neglected. Convenience drives habit.
Drainage Considerations
Raised beds generally have excellent drainage because the soil is above grade and water flows down and out through the open bottom. In most situations, drainage takes care of itself. However, a few situations need attention:
- Clay soil underneath: If the native soil under your bed is heavy clay, water can pool under the bed since it drains out of the light bed mix but cannot percolate through the clay. In this case, dig a shallow trench (6 inches deep) under the bed, fill it with gravel, and then build the bed on top. This creates a drainage channel.
- Concrete or patio surfaces: If building on concrete or pavers, drill or punch drainage holes through any solid material below, or add a layer of gravel under the bed.
- Very tall beds (24+ inches): These hold more water weight and can become waterlogged in the bottom few inches. Adding extra perlite or coarse gravel to the bottom 4 inches helps.
Maintenance and Longevity
- Add compost annually. Each year, add 1-2 inches of compost on top of the bed at the beginning of the growing season. The soil level drops over time as organic matter breaks down. Compost replenishes nutrients and maintains soil volume.
- Mulch the surface. A 2-3 inch layer of straw, wood chips, or shredded leaves on top of the soil retains moisture, suppresses weeds, and moderates soil temperature.
- Inspect the wood annually. Check corners for loose screws and boards for rot. Cedar lasts a long time but is not immortal. Catching a failing board early lets you replace just that board instead of rebuilding the whole bed.
- Do not paint or seal the interior. The inside of the bed should be bare wood. Paints and sealers can leach chemicals into the soil. The exterior can be painted or stained for aesthetics if you want.
Common Mistakes to Avoid
- Building too wide. If you cannot reach the center without stepping in, you will compact the soil — defeating the purpose of a raised bed. Four feet max, two feet if one-sided access.
- Using untreated pine. It will rot in one to two seasons. Either spend the money on cedar or use pressure-treated lumber.
- Filling with pure topsoil or garden soil. It compacts, drains poorly, and lacks nutrients. Use a proper mix of topsoil, compost, and drainage material.
- Skipping the center brace on long beds. Soil is heavy — a cubic foot of damp soil weighs about 80 pounds. An 8-foot bed holds over a ton of soil. Without center bracing, the long walls will bow outward within a season.
- Placing the bed in shade. Most edible plants need full sun (6-8 hours minimum). A beautifully built bed in the wrong spot produces disappointing results.
- Overtightening screws in cedar. Cedar is a soft wood. Overtighten and the screw pulls through or splits the board. Use a countersink bit and stop when the screw is flush.
Estimated Costs
| Material | Budget (Treated Pine) | Mid-Range (Cedar) | Premium (Cedar + Extras) |
|---|---|---|---|
| Lumber | $20-30 | $60-100 | $80-130 |
| Screws and hardware | $5-10 | $5-10 | $10-15 |
| Soil (bulk delivery) | $30-50 | $30-50 | $50-70 |
| Landscape fabric | $5 | $5 | $5 |
| Total | $60-95 | $100-165 | $145-220 |
For context, a comparable pre-built cedar raised bed kit from a garden center runs $150-300 for a 4x8 and gives you less customization. Building your own saves money and lets you choose exact dimensions and wood quality.
The Bottom Line
A raised garden bed is one of the most rewarding weekend woodworking projects you can take on. The build itself is simple — it is a box made of screwed-together boards. The decisions that matter are choosing the right wood, sizing it for practical access, and filling it with quality soil. Get those three things right and you have a garden bed that will produce food for a decade or more. Grab some cedar, a box of screws, and a free Saturday morning. You can be planting by the afternoon.