How to Square a Board: The 4-Step Method for Flat, Square Stock
Every masterpiece of woodworking, from a simple cutting board to an intricate cabinet, begins with a fundamental truth: the stock must be flat, straight, and square. This isn’t just about aesthetics; it’s the bedrock of structural integrity, joinery precision, and ultimately, the success of your project. The process of taking rough lumber and transforming it into perfectly milled, dimensionally accurate stock is known as squaring a board, and it’s a classic, time-honored sequence every woodworker must master.
Imagine trying to build a house on a crooked foundation. Doors wouldn’t close, walls wouldn’t meet, and the entire structure would be compromised. In woodworking, unsquare stock is that crooked foundation. This guide will walk you through the essential 4-step method, detailing how to achieve perfectly milled lumber using both power tools and traditional hand tools.
Why Square Stock Matters
The importance of square stock cannot be overstated. It is the silent hero behind every successful woodworking project, directly impacting accuracy, strength, and appearance.
- Precision Joinery: Whether you’re cutting dovetails, mortise and tenons, rabbets, or even simple butt joints, the fit depends entirely on the mating surfaces being flat and square. Gaps in joinery are not only unsightly but also significantly weaken the connection. A perfectly square board ensures tight, strong joints that will last for generations. For more on how these joints are created, refer to our guide on /beginner-woodworking-joints-guide/.
- Accurate Measurements and Layouts: All your measurements – length, width, thickness, and angles – are referenced from the surfaces and edges of your stock. If your stock isn’t square, your measuring tape or marking gauge will be referencing an inconsistent surface, leading to cumulative errors that multiply as your project progresses. What starts as a minor deviation can quickly become a major headache.
- Eliminating Gaps and Racking: When assembling panels, tabletops, or carcases, flat and square stock ensures that all components fit together seamlessly, without unsightly gaps or misalignments. This also prevents “racking,” where a structure twists or leans because its components aren’t truly plumb or level with each other.
- Structural Stability: Furniture built from accurately milled lumber is inherently more stable and robust. Components exert even pressure on each other, distributing stress effectively. Conversely, a project built with twisted or cupped stock will be under constant internal stress, making it prone to warping, cracking, or even catastrophic failure over time.
- Safety with Power Tools: Many woodworking machines, such as the table saw, router table, and band saw, rely on fences and tables to guide the material accurately. If your stock isn’t flat and square, it won’t register correctly against these surfaces, leading to unstable cuts, kickback risks, and potentially dangerous situations. A flat face against the table and a square edge against the fence are crucial for safe and predictable machining.
- Material Economy: While it might seem counterintuitive, taking the time to square your stock can actually save material. By starting with a known flat and square reference, you can make the most efficient cuts, minimizing waste and ensuring that subsequent operations precisely remove only the necessary amount of material.
- Professional Results: Ultimately, the hallmark of skilled craftsmanship is attention to detail. Projects made from square stock simply look and feel better. They have a crispness, a solidity, and a visual appeal that can only be achieved through meticulous preparation.
In essence, squaring a board is not just a preparatory step; it’s an investment in the quality, durability, and beauty of your finished work. It’s the foundation upon which all other woodworking skills are built.
The Reference Face and Reference Edge Concept
Before we dive into the steps, it’s crucial to understand the “Reference Face” and “Reference Edge” concept. This is the cornerstone of accurate milling and is what prevents cumulative errors throughout the process.
Think of it like setting up a coordinate system. In a 3D space, you need a starting point (an origin) and three perpendicular axes (X, Y, Z) to define any other point. In woodworking, your board needs a similar reference system.
- The Reference Face: This is the first surface you flatten. It becomes your primary “zero” plane. All subsequent operations will reference this face. When you put a board through a planer, for instance, the planer bed supports the reference face, ensuring the opposite face becomes parallel to it. When you rip a board on the table saw, the reference face rests on the saw table.
- The Reference Edge: This is the first edge you joint square to the Reference Face. It becomes your secondary “zero” line, perpendicular to the Reference Face. When you rip a board on the table saw, the reference edge rides against the rip fence, ensuring the cut edge is parallel to it. When crosscutting, the reference edge will often register against the miter gauge or sled fence to ensure square ends.
By establishing these two perfectly flat and square surfaces, all subsequent cuts are made in relation to them. You’re not just measuring arbitrary distances; you’re ensuring that every dimension is consistent and every angle is true relative to a known, perfect starting point. This systematic approach eliminates guesswork and drastically reduces the potential for error. It’s the reason the 4-step method works so effectively.
Step 1: Flatten One Face
The first and most critical step is to establish one perfectly flat, untwisted face. This will become your Reference Face. This step is about removing any cup, bow, or twist from the board.
Tools for Flattening:
- Jointer: The most common power tool for this task.
- Hand Plane: Traditional method, excellent for all sizes of boards.
- Router Sled: Ideal for very wide, thick, or challenging slabs.
- Winding Sticks: Essential for checking flatness and twist.
- Straightedge: For checking flatness.
Jointer Method
The jointer excels at creating a flat face.
- Safety First: Ensure your jointer’s fence is set to 90 degrees (or your desired angle, though 90 is standard for milling). The outfeed table must be precisely level with the top of the cutting knives at their highest point. Wear eye and ear protection. Use push blocks or push shoes to keep your hands away from the cutterhead.
- Inspect the Board: Examine your board for cup, bow, or twist.
- Cup: Concave or convex across the width. Place the concave side down on the jointer bed.
- Bow: Concave or convex along the length. Place the concave side down.
- Twist: The most challenging. Use winding sticks (explained below) to identify high spots.
- Taking Passes:
- Set the depth of cut to a shallow pass (1/32” to 1/16” is typical for initial passes).
- For cupped or bowed boards, place the concave side down. Apply firm, even pressure over the infeed table, then transition pressure to the outfeed table as the board passes over the cutterhead. Maintain continuous forward motion.
- For twisted boards, identify the highest corners with winding sticks. Start with light passes, focusing on removing material from those high spots. You might need to make partial passes or apply pressure strategically to the higher areas.
- Make repeated passes, checking frequently with a straightedge and winding sticks.
- Checking Your Work with Winding Sticks:
- Winding sticks are two perfectly straight, parallel pieces of wood (often with contrasting colors for visibility).
- Place one stick at each end of the board, across its width.
- Crouch down and sight along the top edges of the sticks. If they appear parallel, the board is flat and free of twist. If they converge or diverge, the board has twist, and you’ll need to continue jointing the high areas.
- Also, use a straightedge across the face to ensure no high or low spots remain. The board should not rock when placed on a known flat surface.
Hand Plane Method
Flattening with hand planes is a meditative and rewarding process, offering precise control.
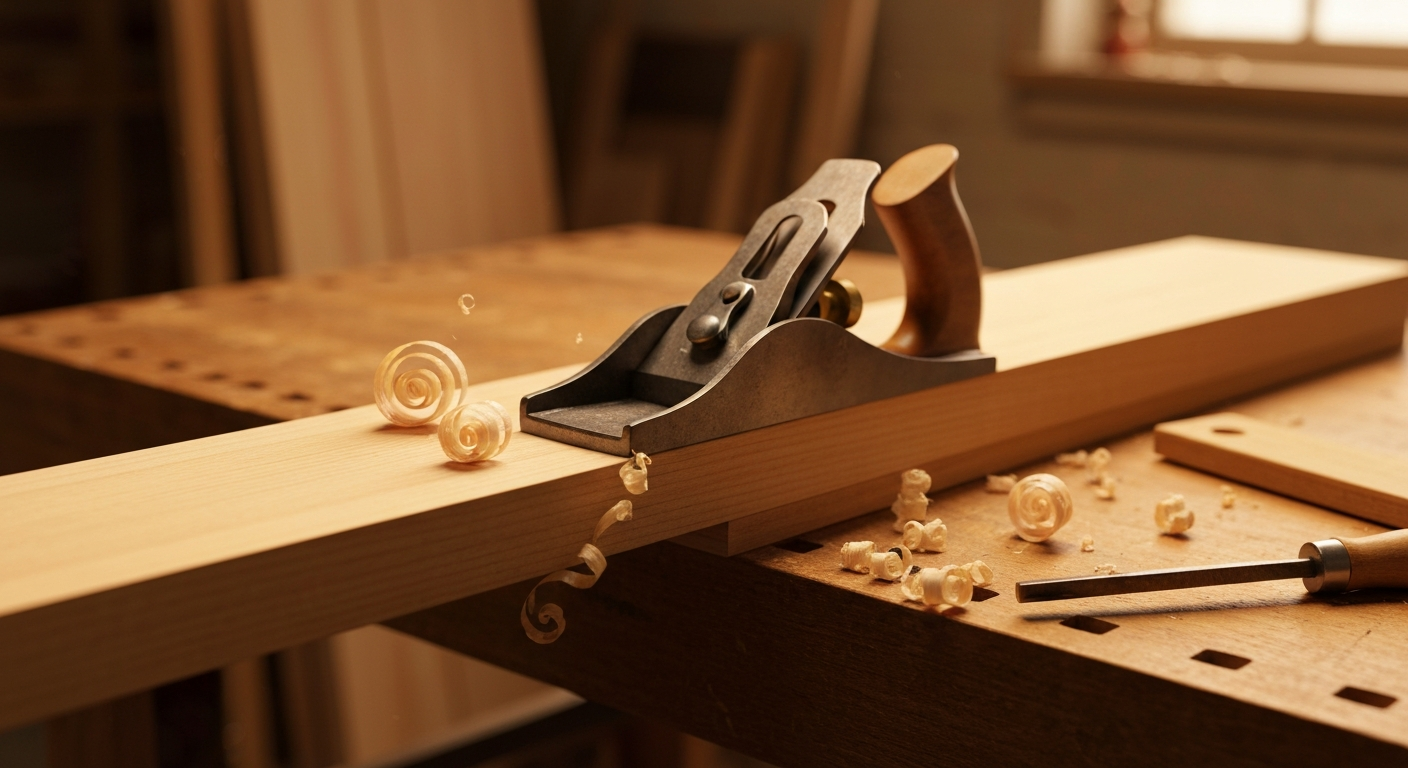
- Tools: You’ll need a large plane, typically a Jack Plane (#5) for initial flattening, followed by a Jointer Plane (#7 or #8) for final truing. A straightedge and winding sticks are essential.
- Identify High Spots: Use winding sticks to pinpoint twisted areas and a straightedge to find cupped or bowed sections. Mark these high spots with a pencil.
- Rough Flattening (Jack Plane): Set your Jack plane for a relatively aggressive cut. Work diagonally across the grain in the high areas, focusing on removing material quickly. For severely twisted boards, you might plane across the width at the ends to remove “ears.”
- Refining (Jointer Plane): Once the board is roughly flat, switch to your Jointer plane with a finer set. Plane with the grain, taking long, continuous shavings. Continue checking with winding sticks and a straightedge. The goal is to bring the entire surface into a single, flat plane.
- Patience and Feel: This method requires patience and develops a keen sense of touch. Listen to the plane’s sound, observe the shavings, and feel for resistance.
Router Sled Method
For very wide, thick, or unwieldy slabs that won’t fit a jointer, a router sled is an excellent solution.
- Setup: You’ll need a flat base (MDF or plywood), two parallel rails (also flat and straight) that are taller than your board, and a router sled that slides smoothly on the rails. The router sled holds your router with a large-diameter surfacing bit.
- Secure the Board: Clamp or shim your board securely to the base, ensuring it doesn’t move. Shims can be placed under the board’s high spots to minimize rocking and material removal.
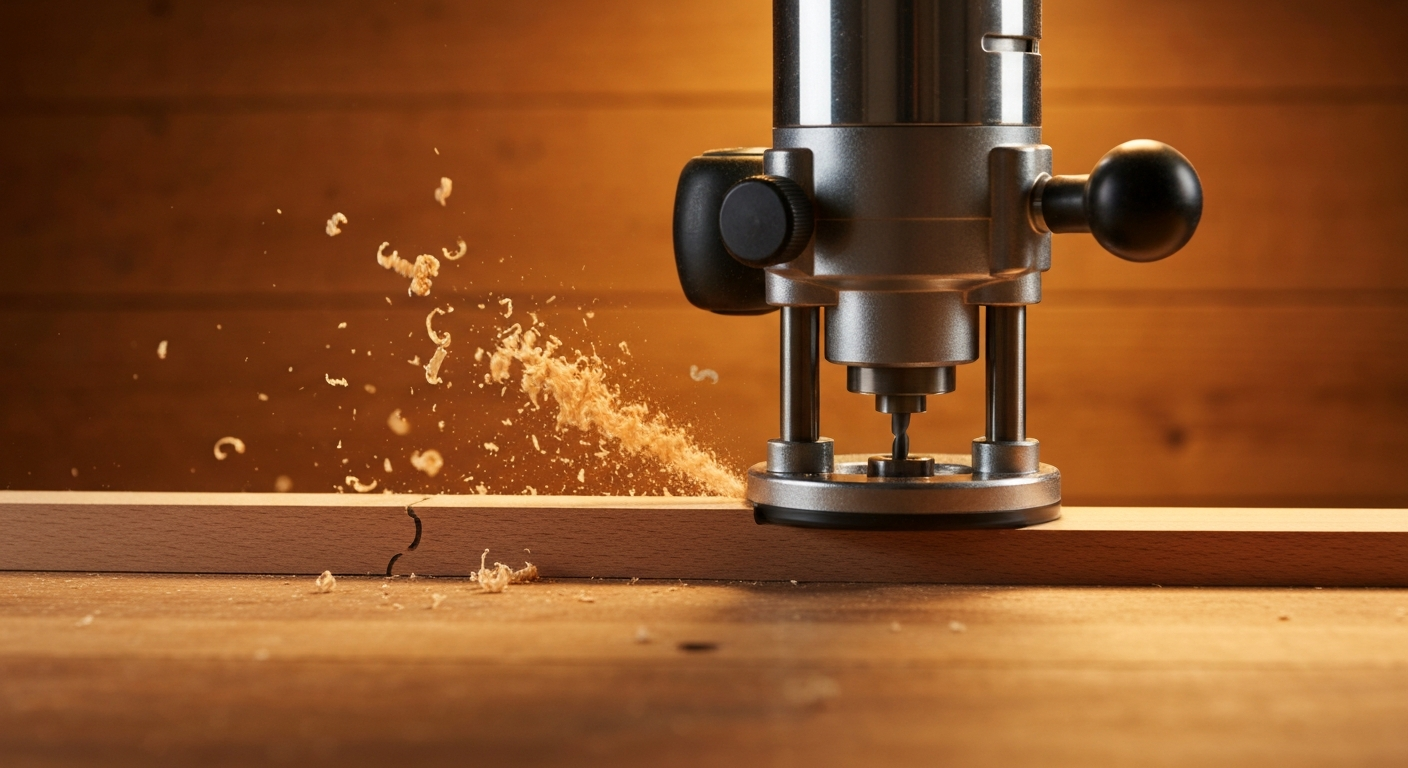
- Routing Passes: Set a shallow depth of cut (around 1/8” to 1/4”). Move the router sled systematically across the board, overlapping each pass slightly. Work your way from one end to the other.
- Check and Repeat: Once one side is done, remove the board, clean up the surface, and check for flatness with a straightedge and winding sticks. You may need to flip the board and repeat the process for the second face if it’s still uneven.
- Advantages: Can handle very large material, makes quick work of wide surfaces.
- Disadvantages: Generates a lot of dust, requires a dedicated setup, can be noisy.
By the end of Step 1, you will have one perfectly flat surface. This is your Reference Face. Mark it clearly with a pencil (e.g., a squiggly line or an “F”).
Step 2: Joint One Edge Square to That Face
With your Reference Face established, the next step is to create one perfectly straight edge that is precisely 90 degrees (square) to that face. This will become your Reference Edge.
Tools for Jointing an Edge:
- Jointer: The most efficient power tool.
- Hand Plane: A jointer plane is ideal.
- Combination Square: For checking squareness.
- Straightedge: For checking straightness.
Jointer Method
The jointer is designed for this task, creating a straight and square edge quickly.
- Safety First: Ensure the jointer fence is set precisely to 90 degrees relative to the jointer bed. Double-check this with a reliable combination square. Wear eye and ear protection, and use appropriate push pads.
- Prepare the Board: Place your board with the Reference Face firmly against the jointer fence. This is critical because the fence will ensure the edge being cut is square to that reference face.
- Taking Passes:
- Set a shallow depth of cut (1/32” to 1/16”).
- Apply firm, even pressure, keeping the reference face tight against the fence and the board flat on the jointer bed.
- Make continuous passes until the entire edge is straight and smooth. You’ll know it’s straight when you’re getting a full-width shaving along the entire length of the board.
- Checking Your Work:
- Use a straightedge along the newly jointed edge to confirm it’s perfectly straight, with no gaps.
- Place a combination square on the Reference Face, with the blade resting against the newly jointed edge. There should be no gap between the square’s blade and the wood, indicating a perfect 90-degree angle.
Hand Plane Method
Jointing an edge with a hand plane requires practice but yields excellent results.
- Tools: A Jointer Plane (#7 or #8) is ideal due to its long sole, which helps maintain straightness. A straightedge and a combination square are essential. A shooting board can also be very helpful for squaring edges, particularly for shorter pieces.
- Marking: Use a marking gauge to scribe a line along the edge, referencing your Reference Face. This line will guide you to a consistent width if you’re trying to remove a specific amount of material.
- Planing Technique:
- Secure the board in a vise or against a planing stop, with the Reference Face facing up or towards you.
- Hold the jointer plane firmly, ensuring its sole is flat against the edge and the body is square to the Reference Face.
- Take long, continuous passes along the grain. Focus on removing material evenly.
- For a truly straight edge, you might need to take a few passes, then check with your straightedge, identify high spots, and focus your next passes there.
- Using a Shooting Board (Optional but Recommended): A shooting board provides a perfectly square fence for your plane to ride against, making it easier to achieve a 90-degree angle. The board is placed on the shooting board, and the plane slides on its side, cutting the edge perfectly square.
- Checking Your Work: As with the jointer method, use a straightedge to check for straightness and a combination square to ensure the edge is perfectly 90 degrees to the Reference Face.
By the end of Step 2, you will have one perfectly flat Reference Face and one perfectly straight edge that is 90 degrees to that face – your Reference Edge. Mark the Reference Edge with a single straight line or an “E”.
Step 3: Plane to Thickness
Now that you have a flat Reference Face and a square Reference Edge, you can bring the board to its final thickness. This involves making the second face perfectly parallel to your Reference Face.
Tools for Thicknessing:
- Thickness Planer: The fastest and most accurate power tool.
- Hand Plane: For traditional methods, requires more effort.
- Calipers/Thickness Gauge: For precise measurement.
Thickness Planer Method
The thickness planer is designed to create parallel faces.
- Safety First: Wear eye and ear protection, and ensure good dust collection. Never plane stock that is too short or too thin (consult your planer’s manual for minimum dimensions). Avoid feeding multiple boards side-by-side if they vary significantly in thickness, as this can lead to uneven pressure and snipe.
- Reference Face Down: This is crucial. Place your board in the planer with the Reference Face facing down, resting on the planer bed. The planer’s rollers and cutterhead will then reference this flat surface, ensuring the top face becomes perfectly parallel to it.
- Taking Passes:
- Set a shallow depth of cut (1/32” to 1/16” is typical).
- Feed the board through the planer, maintaining consistent pressure if necessary (though the planer’s rollers do most of the work).
- Flip the board end-for-end between passes to help minimize snipe (a slight dip at the ends of the board). Some woodworkers also advocate flipping the board face-for-face (Reference Face up) for a pass or two, though the primary goal is to maintain the Reference Face down for most cuts.
- Continue taking passes, checking the thickness with calipers or a ruler, until you reach your desired final thickness.
- Dealing with Snipe: Snipe can often be reduced by supporting the board on the infeed and outfeed sides, or by taking very shallow final passes.
- Checking Your Work: Use calipers or a reliable ruler to measure the thickness at several points along the board. It should be consistent from end to end and edge to edge. The board should also feel solid and not rock on a flat surface.
Hand Plane Method
Thicknessing with hand planes is the most labor-intensive step but offers ultimate control.
- Tools: A Scrub Plane (#40 or similar) can be used for aggressive material removal, followed by a Jack Plane (#5) and finally a Jointer Plane (#7 or #8) for smoothing and accuracy. A marking gauge, straightedge, and calipers are indispensable.
- Marking Thickness: Use a marking gauge to scribe a line around all four edges of the board, set to your desired final thickness, referencing your Reference Face. This provides a visual guide for how much material to remove.
- Planing:
- Secure the board on your workbench with planing stops or dogs.
- Start with the scrub plane (if using) to quickly remove the bulk of the waste, planing across the grain or diagonally.
- Switch to the jack plane, then the jointer plane, working with the grain. Focus on removing material evenly across the entire surface, constantly checking against your scribed lines and with your calipers.
- Use a straightedge to check for flatness as you go. The goal is to create a second flat face that is perfectly parallel to your Reference Face.
- Patience and Persistence: This step requires significant effort and patience. Take breaks, resharpen your plane irons, and keep checking your progress.
By the end of Step 3, you have a board with two parallel faces (one is your Reference Face) and one straight edge that is square to both faces (your Reference Edge). Your stock is now milled to its desired thickness.
Step 4: Rip and Crosscut to Width and Length
With your board now flat and true in thickness, the final step is to bring it to its desired width and length. This is where the table saw (or hand saws) comes into play, always referencing your established Reference Face and Reference Edge.
Tools for Ripping and Crosscutting:
- Table Saw: The primary power tool for this step.
- Rip Fence: For accurate width cuts.
- Miter Gauge or Crosscut Sled: For accurate length cuts and square ends.
- Push Stick/Block: Essential safety tools.
- Hand Saws: Rip saw, crosscut saw.
- Measuring Tape, Ruler, Square: For marking and checking dimensions.
Table Saw Method (Rip to Width)
Ripping cuts the board along its length to the desired width.
- Safety First: Ensure your table saw blade is sharp and properly aligned. Use a splitter or dado blade guard to prevent kickback. Always use a push stick or push block, especially for narrow pieces. Never freehand a rip cut; always use the rip fence.
- Set Up: Set your rip fence to the desired final width.
- Reference Against Fence: Place your board on the table saw with the Reference Edge firmly against the rip fence and the Reference Face resting on the table saw top. This ensures that the new cut edge will be perfectly parallel to your Reference Edge and square to your Reference Face.
- Make the Cut: Feed the board slowly and consistently through the saw, keeping the Reference Edge tight against the fence. Use a push stick to complete the cut safely.
- Check Your Work: Measure the width at both ends of the board to ensure it’s consistent. The newly cut edge should be parallel to the Reference Edge and square to the Reference Face.
Table Saw Method (Crosscut to Length)
Crosscutting cuts the board across its width to the desired length and squares the ends.
- Safety First: Use a miter gauge or a crosscut sled for accurate and safe crosscuts. Never use the rip fence as a stop block when crosscutting, as this can trap the offcut and cause kickback.
- Square One End: Place your board on the table saw with the Reference Edge against the miter gauge fence (or crosscut sled fence) and the Reference Face on the table. Make an initial cut to square up one end of the board, removing only a small amount of material. This establishes a truly square end.
- Measure and Cut to Length: Measure from the newly squared end to your desired final length. Mark the cut line. Position the board so your mark aligns with the saw blade. Make the final cut.
- Check Your Work: Use a reliable square to check that the ends are perfectly 90 degrees to both faces and edges. Measure the length at both edges to ensure consistency.
Hand Saw Method
For those without power tools, hand saws can achieve excellent results with practice.
- Tools: A Rip Saw for cutting along the grain (width), and a Crosscut Saw for cutting across the grain (length). A marking gauge, measuring tape, square, and a reliable workbench with a vise are necessary.
- Ripping to Width:
- Mark your desired width precisely using a marking gauge and a straightedge, referencing your Reference Edge.
- Secure the board in a vise.
- Use your rip saw to cut along the marked line. Focus on keeping the saw plumb and following the line accurately. A saw guide can be helpful for beginners.
- Crosscutting to Length:
- Square one end first. Use a square to draw a precise line across the board, referencing your Reference Edge and Reference Face. Cut carefully with your crosscut saw.
- Measure from this newly squared end to your desired final length, mark it, and make the final cut.
- Refining: After sawing, you may use a block plane or a sharp chisel to pare away any slight imperfections and achieve perfect squareness.
By the end of Step 4, your board is now fully dimensioned: flat, square, and cut to its exact width and length. It is now ready for joinery, assembly, or any other woodworking operation. For beginners looking for suitable materials, /best-wood-for-beginner-woodworking/ offers excellent starting points.
Doing It Without Power Tools (Hand-Plane Method)
The entire 4-step milling sequence can be accomplished with hand tools, a testament to traditional woodworking craftsmanship. It’s a slower, more tactile process, but incredibly rewarding and builds a deep understanding of wood.
Here’s a summary of the hand-tool approach, integrating the methods discussed in each step:
-
Flatten One Face (Reference Face):
- Tools: Winding sticks, straightedge, Jack plane (#5) for initial material removal, Jointer plane (#7 or #8) for final flattening and truing.
- Process: Use winding sticks to identify twist. Plane diagonally across the grain with the Jack plane to remove high spots quickly. Then, use the Jointer plane with the grain, taking long, continuous shavings, constantly checking with winding sticks and a straightedge until the face is perfectly flat and free of twist. Mark this as your Reference Face.
-
Joint One Edge Square to That Face (Reference Edge):
- Tools: Jointer plane (#7 or #8), straightedge, combination square. A shooting board is highly recommended.
- Process: Secure the board. Place the Reference Face against a workbench stop or in a vise. Use the Jointer plane to remove material from the edge, keeping the plane’s sole flat against the edge and its body square to the Reference Face. Check frequently with a straightedge for straightness and a combination square for squareness to the Reference Face. If using a shooting board, position the board and plane against the board’s fence for accurate 90-degree cuts. Mark this as your Reference Edge.
-
Plane to Thickness:
- Tools: Marking gauge, calipers, scrub plane (optional), Jack plane (#5), Jointer plane (#7 or #8), straightedge.
- Process: Use a marking gauge to scribe lines around all four edges, referencing your Reference Face, to your desired final thickness. Use the scrub plane or Jack plane to remove the bulk of the material from the second face, working across or diagonally to the grain. Finish with the Jointer plane, working with the grain, taking fine shavings. Constantly check the thickness with calipers and flatness with a straightedge until the second face is perfectly parallel to the Reference Face.
-
Rip and Crosscut to Width and Length:
- Tools: Marking gauge, straightedge, square, rip saw, crosscut saw, block plane (for fine adjustments).
- Process (Rip to Width): Use a marking gauge to scribe a line for the desired width, referencing your Reference Edge. Secure the board and use a rip saw to cut along the line, ensuring the saw is plumb.
- Process (Crosscut to Length): Use a square to draw a line for squaring one end, referencing your Reference Edge and Reference Face. Cut with a crosscut saw. Measure and mark the final length, then make the final cut.
- Refinement: Use a block plane to pare any saw marks or achieve perfect squareness on the cut edges and ends.
The hand-tool method demands sharp tools, good technique, and a lot of practice, but it’s a deeply satisfying way to mill lumber and provides an intimate connection with the material.
Checking Your Work
No matter which method you use, checking your work at each step is crucial. This proactive approach prevents errors from compounding and ensures the final quality of your stock.
-
The Square:
- Combination Square: Your most versatile friend. Use it to check if edges are 90 degrees to faces, and if ends are 90 degrees to edges. Place the body firmly on the reference face and slide the blade against the edge. Look for any light gaps.
- Try Square: Similar to a combination square but fixed at 90 degrees. Excellent for checking small areas.
- Framing Square: Useful for checking large panels or wider boards for squareness.
- Always check multiple points: Don’t just check one spot; move the square along the length of the edge or across the width of the face.
-
The Winding Sticks:
- As discussed in Step 1, winding sticks are invaluable for detecting twist. Place them at opposite ends of the board and sight along their top edges. Any non-parallel appearance indicates twist. Essential for flattening faces.
-
The Straightedge:
- A good quality metal or wooden straightedge is vital for checking flatness and straightness.
- Faces: Lay the straightedge across the face in various directions (lengthwise, crosswise, diagonally). Look for light gaps underneath, indicating high or low spots.
- Edges: Lay the straightedge along the edge to ensure it’s perfectly straight, with no concave or convex sections.
-
The ‘Does It Rock’ Test:
- A simple, yet effective test for flatness. Place your board on a known flat surface (your table saw top, a cast-iron machine bed, or a truly flat workbench). If the board rocks, it’s not flat. Identify the high spots causing the rock and address them.
-
Calipers and Tape Measure:
- Use calipers for precise thickness measurements, checking at several points to ensure consistency.
- A reliable tape measure or ruler is used for checking width and length. Again, measure at multiple points to confirm parallel edges and consistent dimensions.
-
Visual Inspection:
- Don’t underestimate your eyes. Look for tearout, chatter marks, or burn marks from power tools, which indicate dull blades, incorrect feed rates, or improper technique. Hand-planed surfaces should show consistent, fine shavings.
- Hold the board up to the light and sight down its length and across its width. This can reveal subtle imperfections.
By diligently checking your work at each stage, you’re not just ensuring accuracy; you’re also learning to “read” the wood and develop a critical eye, skills that are fundamental to becoming a proficient woodworker.
Frequently Asked Questions
Q1: Can I skip a step in the 4-step method to save time?
A: While it might be tempting to skip a step, especially with rough lumber, it is strongly advised against. The 4-step method is a cumulative process where each step builds upon the accuracy of the previous one, establishing critical reference surfaces. Skipping a step almost guarantees that your stock will not be truly flat and square, leading to inaccuracies, weak joints, and frustration later in your project. It’s an investment in the quality of your work.
Q2: How flat and square does the board really need to be?
A: The degree of precision required depends heavily on the project. For fine furniture, cabinetry, or joinery that demands tight, gap-free fits (like dovetails or mortise and tenons), the stock needs to be as close to perfect as possible – often within a few thousandths of an inch. For rough construction projects, framing, or less critical applications, a slightly less stringent standard might be acceptable. However, even for rough work, having generally flat and square stock makes assembly easier and results in a more stable final product. When in doubt, aim for higher precision.
Q3: My jointer isn’t perfectly square to the fence. What should I do?
A: A jointer fence that isn’t precisely 90 degrees to the bed will produce edges that are not square to your reference face. Most jointers have adjustment mechanisms (usually bolts or knobs) that allow you to fine-tune the fence angle. Use a reliable precision square (e.g., a machinist’s square or a high-quality combination square) to check the angle, make small adjustments, and re-check until it’s perfect. Do not proceed with jointing edges until your fence is accurately set. If your jointer doesn’t have an adjustment, or it’s stuck, you might need to shim the fence, but adjustment is always preferred.
Q4: What if my wood is very twisted, cupped, or bowed? Will I lose too much material?
A: Severely distorted lumber is challenging. You will inevitably lose more material to achieve flatness and squareness. For very twisted or cupped boards, start with shallow passes on the jointer or router sled, focusing on the highest points. Sometimes, it’s more efficient to mill the board into smaller, more manageable pieces if the distortion is extreme. For example, a wide, cupped board might be ripped into narrower strips before jointing and planing, then glued back together. Always assess the board carefully before starting to determine if it’s worth the effort and material loss, or if it’s better suited for a different project.
Q5: How do I know which face or edge to start with as my reference?
A: When selecting your initial Reference Face, choose the surface that is the least distorted or, if cupped, the concave side. Placing the concave side down on the jointer bed provides more stability and allows the jointer to remove material from the high spots (the edges) first. For an edge, choose the straighter of the two if one is significantly worse. The goal is to minimize material removal while achieving flatness. Sometimes, the choice is simply arbitrary if the board has similar levels of distortion on all sides.
Mastering the 4-step method for squaring a board is a foundational skill that will transform your woodworking. It instills discipline, promotes accuracy, and ultimately leads to more beautiful, durable, and satisfying projects. Invest the time to learn and practice this sequence, and you’ll build a solid foundation for all your future creations.